Hi Guys
Welcome back to my blog. Life has been very busy lately, which is why I haven’t written a blog post in a while. I am finally back to bring you a new tutorial.
I have been noticing on my website statistics that quite a few people have been searching about how to use a heat press. So, I thought I would give you a tutorial on how to use a sublimation heat press. Both in video and transcript, so suitable for whichever learning style you prefer.
I am still accepting Guylian or Lindt chocolates as thank you gifts 😛 😉
*Please note: I haven’t been asked to promote or sell items that I mention on this page. These have been purchased based on personal research. Please do the research to find the right heat press for you
Types of Heat Press
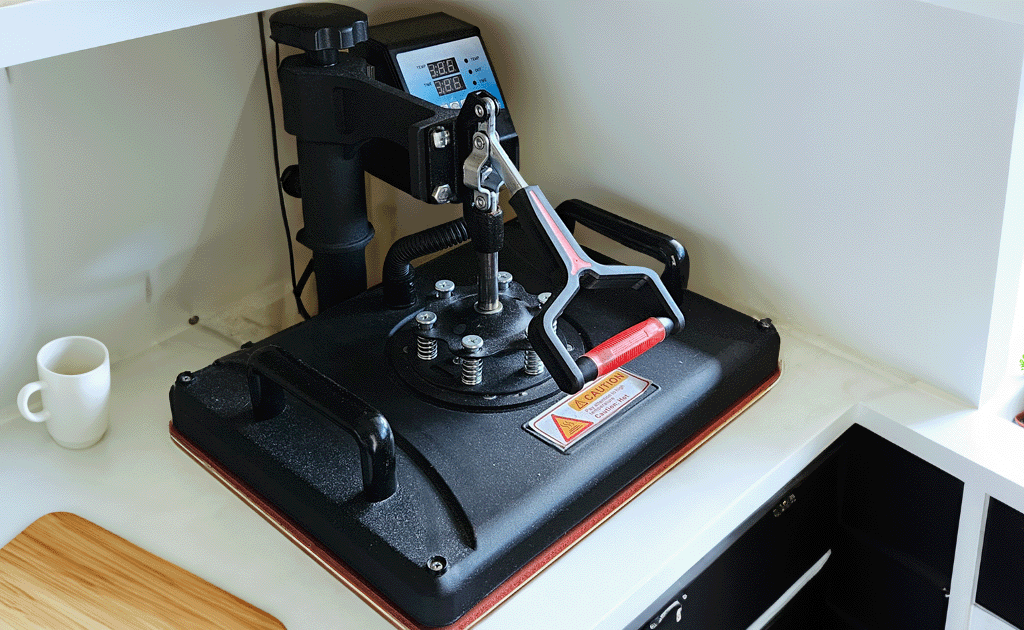
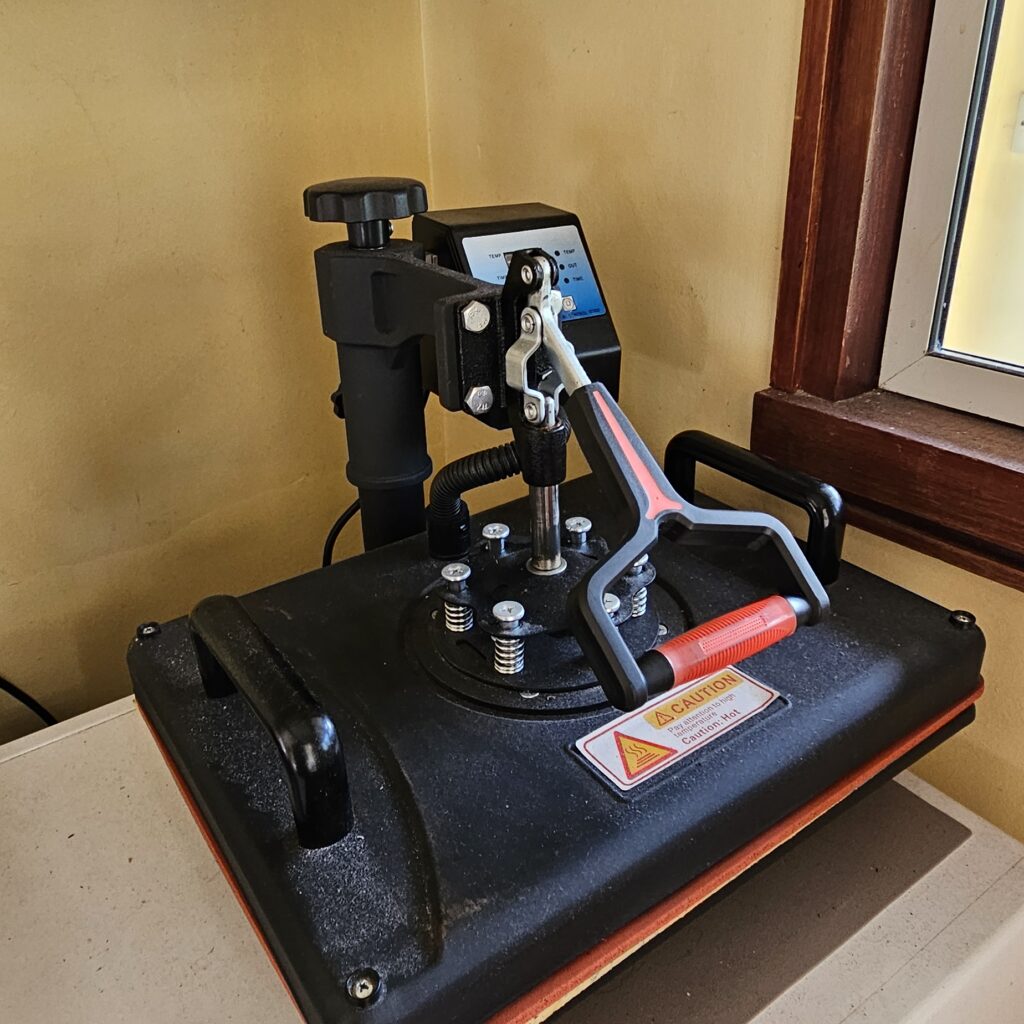
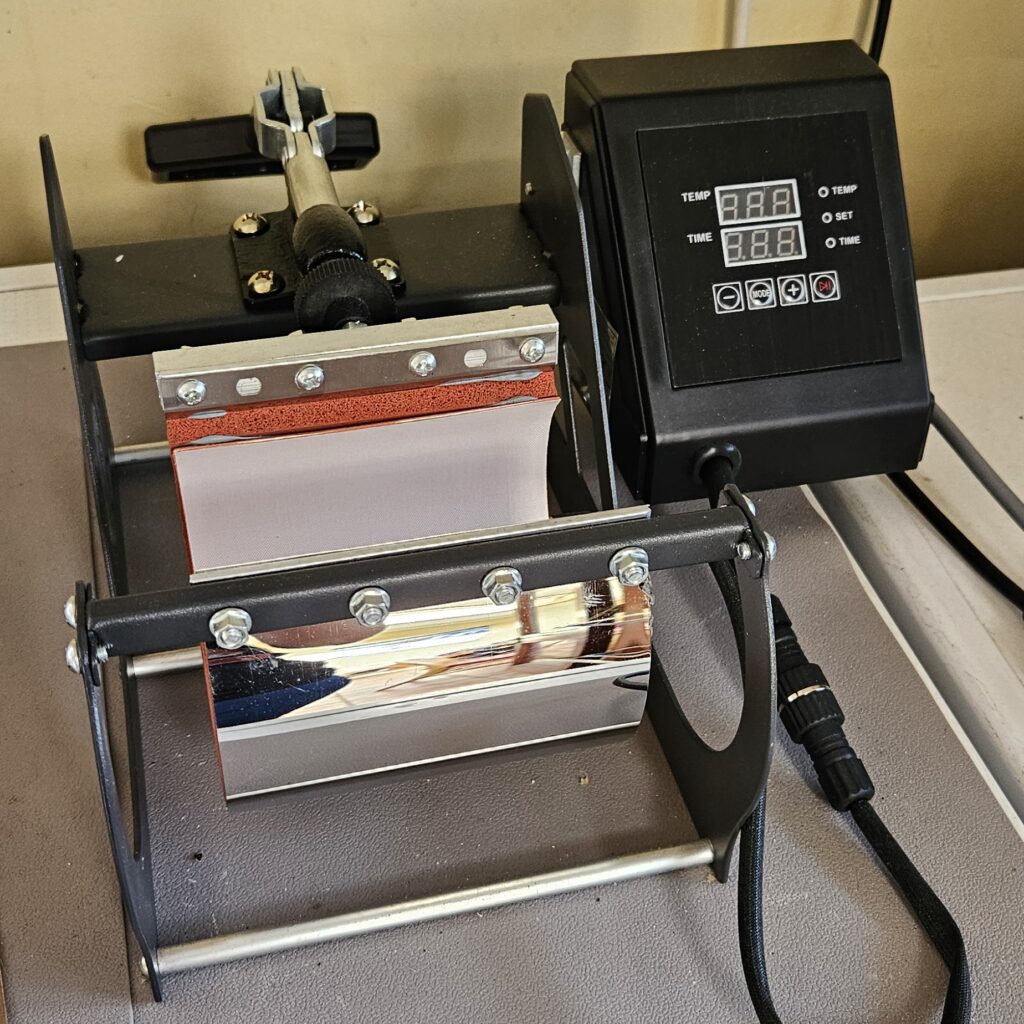
I am going to show you 2 types of heat press. First is the flat or clam heat press, ideal for use for t-shirts, bookmarks, coasters, basically anything that’s flat. And here we have a mug press with an 11 oz attachment. I am going to show you both just so you can see the difference between the types of press.
All heat presses are different, I have seen some clam presses where the bottom pulls out instead of the upper bit swinging out. Some presses will have a button for different pressure levels and so forth, but the basics are the same. So please do your research on presses.

Flat/Clam Press
Let’s start with the clam press.
The basics: There is the control box, it can be removed simply lifting up and removing the cable. Handle to open and close the clamp and it swings out both ways. And at the back here, this knob is the pressure control. Turn clockwise to increase pressure and anti-clockwise to decrease it.
To turn on there is a large red on the side of the control box, flick it on. This machine makes a loud beep to let you know it is on. This clam can take a few minutes to heat up but just make sure not to touch the large black area as it builds up the temperature quickly, handy little warning sticker to remind you. It is safe to touch the handle and these grips with your bare hands so you can swing it out.

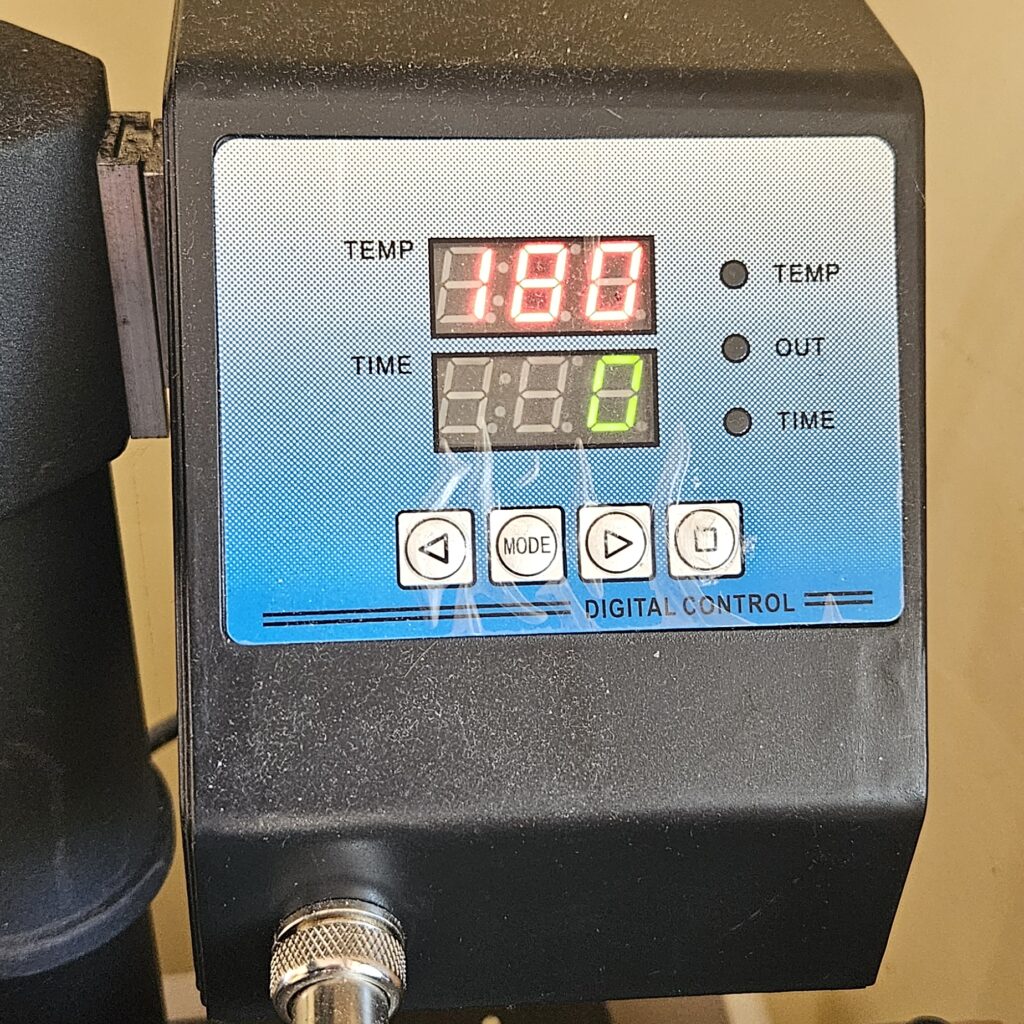
Back to the control box. The top row here is your temperature and you can see it increase until it gets to your set temperature. The next line here is your timer. The lights to the right of the heat and timer indicates that it’s getting hotter, reached temperature and timer on. The little button under the power button is the fuse switch, you can test the fuse using this button if you need to.
To set the temperature, press the button that says mode. As mentioned earlier it might be different on your press, but typically the button in between the triangles or arrows is where you can set the timer and temperature. So press the button once to set your temperature and use the arrows to increase or decrease your temperature. Press the mode button again to confirm temperature and to set the timer. This number is in seconds. And once you’re done, press mode again, grab yourself a coffee and wait for it to reach temperature.
Once it’s at temperature, open your clam press, put in the item you are pressing, close, set your pressure and then press the button with the square symbol on the controller to start the timer. Once your timer is done, it will make a lovely high pitch beeping sound and simply press the button again to turn off, open and remove your product with oven gloves.
To turn off, simply switch the big red button on the side to off and let it cool down.
So, that’s the basics of the clam press.

Mug Press
Moving onto the mug press. I got this mug press as an emergency, I initially thought I had broken my control box for my flat press. Thankfully I hadn’t, I just blew the fuse and it’s fine now, but I got a telling off. Control boxes can be interchanged with other presses as long as they have the same connectors. But I couldn’t buy the control box individually so I had to buy a brand new mug press. Annoyingly the connectors don’t match, but I now have a spare mug press for when I am busy.
Turn on is the same as the clam. A big old button on the side. You have your handle to close the press around your mug or tumbler and a knob to control pressure. I am going to show you how some control box panels may differ slightly on the buttons. You can see the slight differences in the buttons but they serve the same functions as the clam press control box.
Mug presses heat up faster than the clam so you won’t have to wait long for it to reach the set temperature. But I want to show you something on this model. I have a sample mug here.
Now I do store my mugs at room temperature, this makes it better for pressing. But when I put my mug into the press, you can see that the temperature has dropped significantly and is going to start going back up to set temperature.
BUT! I cannot start the timer.
The control box won’t start the timer until it reaches close to the set temperature. My previous mug press never did this so it was a bit confusing when it first started doing this. So this is why I store at room temperature so it doesn’t take as long to reach the right temperature to sublimate. It’s almost like it’s pre warming the mug to ensure the quality of the transfer.
I have not had an issue with quality but it is something to keep an eye on when you start using heat presses as not all presses come with instructions and you may need to adjust timings and what not. Again the importance of testing before you start selling.
Conclusion
So there you have it!
An overview of how to use a heat press. I hope that has been helpful. If you have any questions then feel free to post a comment below.
When looking at heat presses I do recommend purchasing a press from a proper supplier as most of them offer some form of customer support so if you have any issues it is quick to give them a call and get some help or you simply have any questions.
I hope this was of help to you and I appreciate you taking the time to read my blog.
If you have any questions please use the comment section below or use one of my social media channels. If you have a recommendation on software you would like to share, please share in the comments below, let’s all help each other to succeed.
Until Next Time…


Leave A Comment