How to Start a Sublimation Business – Part 3 – Marketplace Platforms

Photo by Roberto Cortese on Unsplash

Hello There Padawan!

Welcome back to my mini-series about how to start a Sublimation business. In Part 3, we will be discussing marketplace platforms. You can catch up on the previous instalments here:

Part 1

Part 2

So, you now have all the equipment you need to start a business. You have developed or are developing some designs you want to sell. But where or how are you going to sell it?

Where to begin?

Grab a coffee and a choccy biccy, and let’s take a look at marketplace platforms


Marketplace Platforms vs. Your Website

First off. What is a marketplace platform?

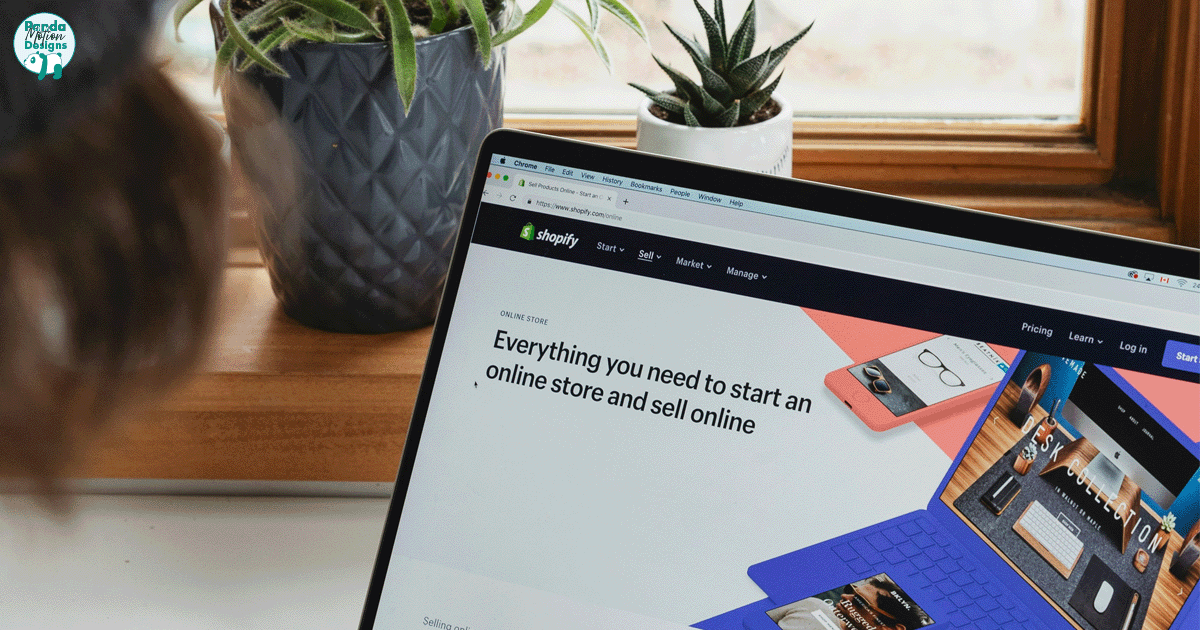
Marketplace platforms are websites or apps that allow businesses to sell products to customers. Some examples of marketplace platforms include Sharetribe, Shopify, and Amazon

Marketplace platforms make it simpler and easier to list items without the need to learn how to build or manage a website. A lot of marketplace platforms also handle tax fees, which, again, makes it easier to manage your store and finances.

The majority of these places will have some initial start-up fees, listing fees and subscriptions, so it’s very important to have a good look and research their fees, both one-off and ongoing, as they can vary wildly. 

Some places, such as Not on the High Street, you need to apply to their platform to sell as they vet everyone and don’t want too many of the same thing being sold and are less likely to have scammers or drop shippers.

You also need to consider digital footfall. Etsy and Shopify are well-known and established, and as a result, they attract more shoppers to their sites.

With your website, you avoid these extra marketplace fees and you just have the annual hosting and domain name fees. So you tend to have better take-home pay. However, you will need to keep an eye on taxes, mailing costs, etc. Marketplaces cover things you wouldn’t normally think of. You also have a lot more work on social media to get shoppers to visit your website.

Fees

Yup. Fees. Sadly nothing is free, especially with the online marketplace hosting. Even with your own website you would have to pay for web hosting and domain name price. These tend to be annual, but some places offer monthly payment plans. No need to pay extra for listing fees, processing fees, etc., that some other platforms charge.

Other platforms such as Etsy, have several little extra fees that they have. You can opt out of some features, such as Etsy off-site advertising. But Etsy has a small list of fees, including listing fees, operating fees, processing fees, VAT fees, etc. They are small amounts but can build up over a month. But no fees or subscription payments.

Other sites such as BuyIndie or MadeMe don’t have listing fees but offer a subscription service instead. Many find this preferable compared to the small multiple fees charged by Etsy. But research the digital footfall on these sites, as you would need to work hard on social media and additional advertising fees to pull in customers yourself.

Advertising

Setting up your shop isn’t the last of it. You will need to bring in customers. 

Etsy offers in-site advertising at an extra cost; They charge you by click-throughs. This is optional. Etsy automatically adds your listings to off-site advertising (on Google, Pinterest, etc.), and they only charge you when you make a sale.I have been told that you can opt out of this as well. I’m not sure about the other sites, but my understanding is that you need to bring in customers yourself or pay extra for them to advertise for you.

Having your website is different. You would have to work hard to bring in the customers, so putting some money into advertising on Google, or Facebook etc. is worth it. But it will require extra effort on your part to get your brand out there.

Traffic

As mentioned previously, a lot of well-established marketplace sites already have good digital traffic. Now, this doesn’t mean success; you still need to work on driving that traffic to your listings with good images, SEO and catchy listing titles to get that cha-ching. 

With your own website and smaller marketplaces you will need to add in the extra work. You don’t already have that digital footprint that other well-established websites already have. Using your website takes longer to establish, so you really need to focus on your SEO and social media campaigns to start seeing those cha-chings come in.

Social Media

Social media will play an important role in generating sales and getting noticed. Whether you have your own website or use a marketplace, you will need a social media presence.

Make sure you have your website link or marketplace link in your bio as well as links in posts and stories to help drive people to your online store. It’s also a great place to announce sales and new products to help generate interest. Again, this will take time, and you will really need to work hard to establish your online presence. I would recommend looking at paying for advertising on Facebook and Instagram to help get your business name up there and bring in followers.

Eventually you may want to start an email/newsletter campaign, offer free items, competitions and more to help with engagement. It can be rewarding if you put the hard work into it.

If you have an Etsy store, make sure to use your share and save link so you get money back on your transaction fees.


Conclusion

In conclusion, if you are starting out, I would suggest starting out on a marketplace such as Etsy or Amazon. Establish yourself, gather reviews, and work on social media to gain visibility. Just make sure you take the fees into account in your pricing.

Now, depending on how your sales go after a year or 2, it would then be worth considering a professional website of your own and start driving traffic to it rather than your marketplace platform. 

Starting your shop takes a lot of work, and it will not be a success from the start. You need to put a lot of dedication into it all before you start seeing those sales come in. Even after 4 years in business, I would not say I have been incredibly successful. Good enough to stay in business but not enough to say my profits are enough to cover my mortgage (still hoping).

But once you put the work into it, it will be worth it. Stay strong and believe in yourself.


Thank you if you have visited my website to read my blog, buy from me or follow me on social media. We greatly appreciate your support in whatever form.

If you have any questions please use the comment section below or use one of my social media channels. If you have any goal recommendations to make; then please comment below.

Until Next Time…


Tutorial – How to Use a Heat Press

Hi Guys

Welcome back to my blog. Life has been very busy lately, which is why I haven’t written a blog post in a while. I am finally back to bring you a new tutorial.

I have been noticing on my website statistics that quite a few people have been searching about how to use a heat press. So, I thought I would give you a tutorial on how to use a sublimation heat press. Both in video and transcript, so suitable for whichever learning style you prefer.

I am still accepting Guylian or Lindt chocolates as thank you gifts 😛 😉

*Please note: I haven’t been asked to promote or sell items that I mention on this page. These have been purchased based on personal research. Please do the research to find the right heat press for you


Types of Heat Press

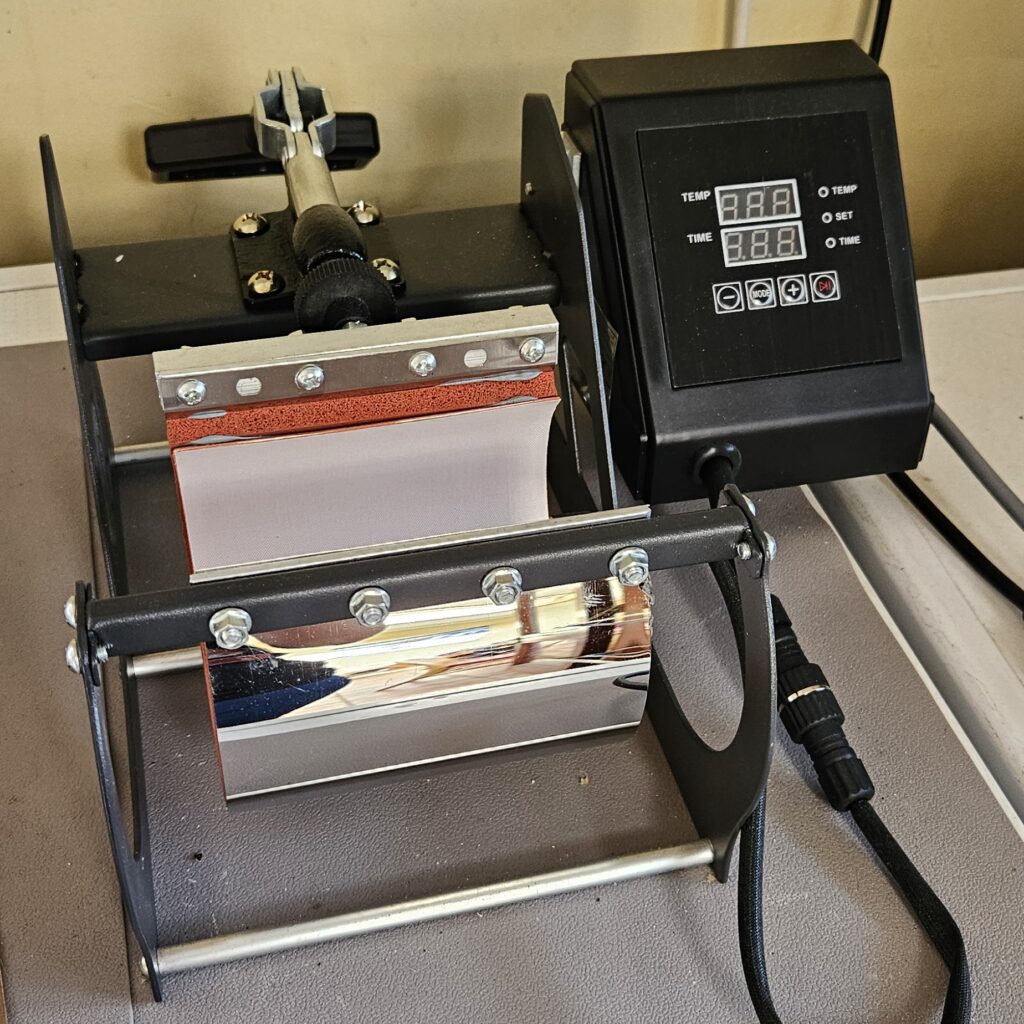
I am going to show you 2 types of heat press. First is the flat or clam heat press, ideal for use for t-shirts, bookmarks, coasters, basically anything that’s flat. And here we have a mug press with an 11 oz attachment. I am going to show you both just so you can see the difference between the types of press.

All heat presses are different, I have seen some clam presses where the bottom pulls out instead of the upper bit swinging out. Some presses will have a button for different pressure levels and so forth, but the basics are the same. So please do your research on presses.


Flat/Clam Press

Let’s start with the clam press.

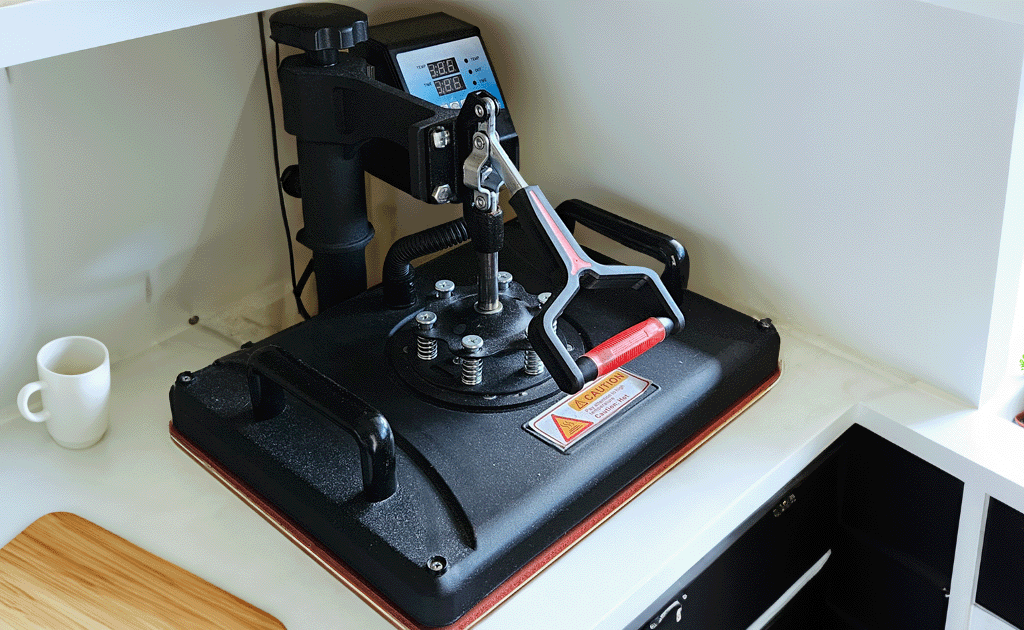
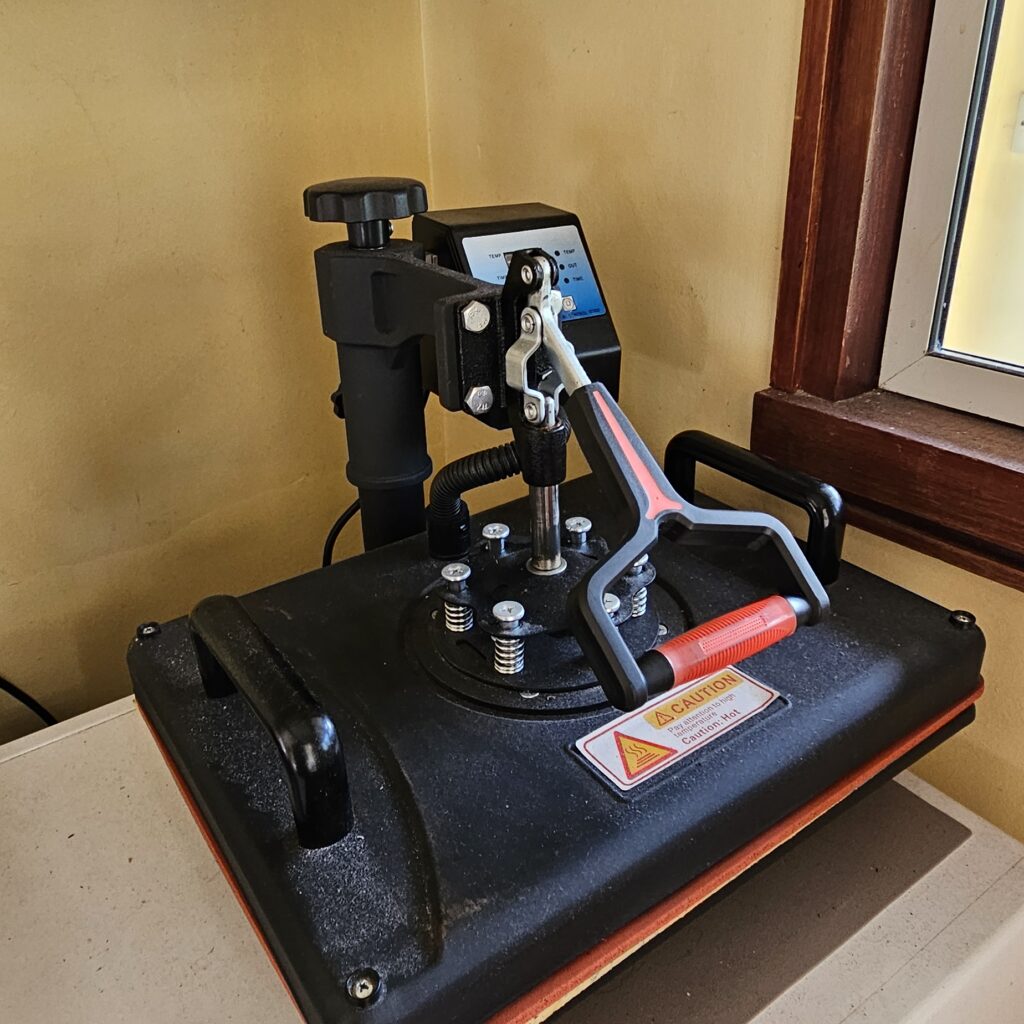
The basics: There is the control box, it can be removed simply lifting up and removing the cable. Handle to open and close the clamp and it swings out both ways. And at the back here, this knob is the pressure control. Turn clockwise to increase pressure and anti-clockwise to decrease it.

To turn on there is a large red on the side of the control box, flick it on. This machine makes a loud beep to let you know it is on. This clam can take a few minutes to heat up but just make sure not to touch the large black area as it builds up the temperature quickly, handy little warning sticker to remind you. It is safe to touch the handle and these grips with your bare hands so you can swing it out.

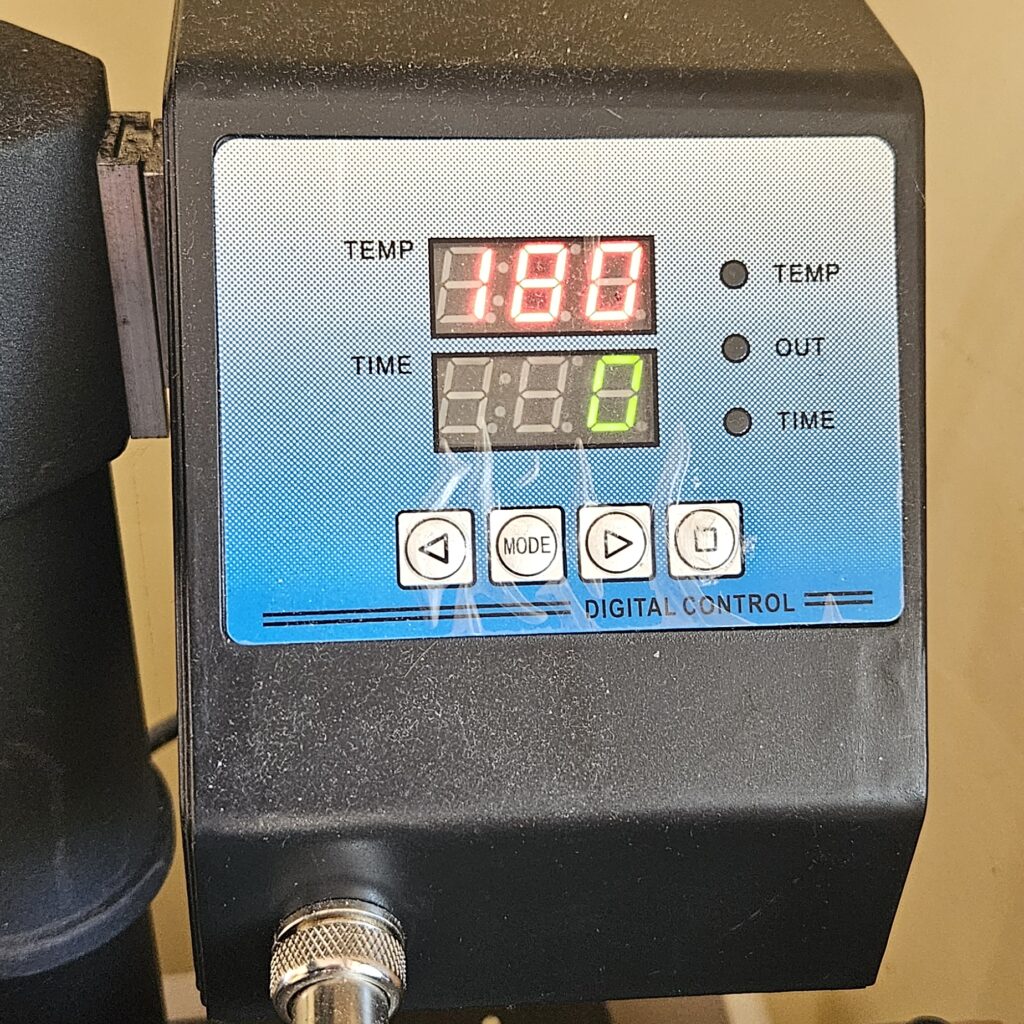
Back to the control box. The top row here is your temperature and you can see it increase until it gets to your set temperature. The next line here is your timer. The lights to the right of the heat and timer indicates that it’s getting hotter, reached temperature and timer on. The little button under the power button is the fuse switch, you can test the fuse using this button if you need to.

To set the temperature, press the button that says mode. As mentioned earlier it might be different on your press, but typically the button in between the triangles or arrows is where you can set the timer and temperature. So press the button once to set your temperature and use the arrows to increase or decrease your temperature. Press the mode button again to confirm temperature and to set the timer. This number is in seconds. And once you’re done, press mode again, grab yourself a coffee and wait for it to reach temperature.

Once it’s at temperature, open your clam press, put in the item you are pressing, close, set your pressure and then press the button with the square symbol on the controller to start the timer. Once your timer is done, it will make a lovely high pitch beeping sound and simply press the button again to turn off, open and remove your product with oven gloves.

To turn off, simply switch the big red button on the side to off and let it cool down.

So, that’s the basics of the clam press.


Mug Press

Moving onto the mug press. I got this mug press as an emergency, I initially thought I had broken my control box for my flat press. Thankfully I hadn’t, I just blew the fuse and it’s fine now, but I got a telling off. Control boxes can be interchanged with other presses as long as they have the same connectors. But I couldn’t buy the control box individually so I had to buy a brand new mug press. Annoyingly the connectors don’t match, but I now have a spare mug press for when I am busy.

Turn on is the same as the clam. A big old button on the side. You have your handle to close the press around your mug or tumbler and a knob to control pressure. I am going to show you how some control box panels may differ slightly on the buttons. You can see the slight differences in the buttons but they serve the same functions as the clam press control box.

Mug presses heat up faster than the clam so you won’t have to wait long for it to reach the set temperature. But I want to show you something on this model. I have a sample mug here.

Now I do store my mugs at room temperature, this makes it better for pressing. But when I put my mug into the press, you can see that the temperature has dropped significantly and is going to start going back up to set temperature. 

BUT! I cannot start the timer. 

The control box won’t start the timer until it reaches close to the set temperature. My previous mug press never did this so it was a bit confusing when it first started doing this. So this is why I store at room temperature so it doesn’t take as long to reach the right temperature to sublimate. It’s almost like it’s pre warming the mug to ensure the quality of the transfer.

I have not had an issue with quality but it is something to keep an eye on when you start using heat presses as not all presses come with instructions and you may need to adjust timings and what not. Again the importance of testing before you start selling.


Conclusion

So there you have it! 

An overview of how to use a heat press. I hope that has been helpful. If you have any questions then feel free to post a comment below.

When looking at heat presses I do recommend purchasing a press from a proper supplier as most of them offer some form of customer support so if you have any issues it is quick to give them a call and get some help or you simply have any questions.


I hope this was of help to you and I appreciate you taking the time to read my blog.

If you have any questions please use the comment section below or use one of my social media channels. If you have a recommendation on software you would like to share, please share in the comments below, let’s all help each other to succeed.

Until Next Time…


How to Start Your Sublimation Business – Part 2 – Software

Hello There Padawan! 

Welcome to part two of my blog series on starting up your own sublimation business.

If you haven’t already, have a read of Part 1 or ‘Sublimation or Vinyl? Which is Best for Me?’ And ‘What on earth is sublimation and why is it awesome?’ or we can go ahead and dive straight into it.

It has been a couple of months since my last blog post. However, July was a hectic month with getting ready for my son starting Primary school (how is he 4 already?). Additionally, his birthday and 2 weeks away in Canada kept me busy; therefore, I just didn’t have the time to share my latest insights/ramblings.

I am still, however, accepting Guylian or Lindt chocolates as thank you gifts. 😛 😉

*Please note: I haven’t been asked to promote or sell items that I mention on this page. These have been purchased based on personal research. Please do the research to find the right software for you*


Do I Really Need Software?

Well…yes. You will need to be able to print your designs from your sublimation printer. In fact, this is pretty simple software; therefore, all you need to check is that the image is reversed when printed.

On the other hand, to resize your design so it fits onto your product correctly, or to make minor edits to your design or to scan your drawing so it can be printed, you will need a form of design or photo editing software.

Let’s take a look at some of the most popular sublimation software’s out there.

Canva

I think everyone has heard of Canva. It’s an easy to use software that can produce some decent results, and many have been using it to design. 

I haven’t used it myself; however, from what I have seen in videos online, it’s a nice bit of software and, consequently, will do pretty much everything you need it to do. There is even a free version of it which is great if starting out plus you can use it to help create social media content and use templates. Plus online tutorials to get you up to speed quickly. Bonus!

Canva Pro does offer extra features including background removal, file translation, being able to schedule social media content and more.

The downside I see to this, however, is that creating a vector design from scratch (like you would in Adobe Illustrator) is not easy. Furthermore, this feature is very simple, and consequently, you won’t get the quality or precision like you would in other software. Nonetheless, if all you are looking for is a software to transfer your designs from paper to digital to printer, then, indeed, this is perfect for you.

Pro: Free version available. Easy to use; therefore, it won’t take long to train up on it. Can be used to create social media templates. Free online tutorials. Phone app version available.

Con: Enhanced features only available in the paid version. Tools not highly advanced like you would find in other software. No vector art.

GIMP

GIMP has come a very long way since I used it in its early life. In fact, it is very much like Adobe Photoshop; however, it is free. Moreover, it does everything you will need it to do and more. 

It could require some tutorial training to get up to speed with the software but once you are well versed in it you are off. 

Pro: Free. Customisable, you have it set up the way you like it. Easy image manipulation tools. Create social media posts.

Con: Can take time to learn. As it is open source, developers work on this in their free time so it can be buggy and could take some time for updates. No phone or app version

Adobe Photoshop and Illustrator

The heavy weights of the graphic design/photography world. Adobe has always been the industry leader and you can mostly rely on their products. I was trained using Adobe so I am comfortable with their products and know them very well, so it is very much my go to software. It has everything I need to do my digital designs and image manipulation. Illustrator is great for creating icons and more intricate designs. And Express has thousands of social media templates for you to use.

However, it is a bit of a monster. And is very intimidating to anyone not well versed in it. There are plenty of tutorials out there. So if you ever get stuck, a quick google will lead you to a tutorial somewhere on the internet. It is also expensive, and a free version hasn’t been available in years. They do have a 30 day trial so you can download it and give it a go. Just remember to cancel before the 30 days is up.

Pro: Create scalable vector designs. Cloud Library to keep your brand on hand in all areas of the software. Simplified phone versions of the software. Produces good results.

Con: Intimidating to use for some. Can take time to learn. Expensive. Additional costs in certain areas. 

Other Softwares are Available

This is just a small example of the software available. Budget is of course an important factor in this so take that into account when looking for software. Take a good look at what tools are available and if it has everything you need.

I would definitely recommend trialling the software. Just so you can to have an idea of what kind of workflow use and if it is the right software for you before committing to any subscription package (if you choose to do so)

*Please note: I haven’t been asked to promote or sell items that I mention on this page. These have been purchased based on personal research. Please do the research to find the right software for you*


I hope this was of help to you and I appreciate you taking the time to read my blog.

If you have any questions please use the comment section below or use one of my social media channels. If you have a recommendation on software you would like to share, please share in the comments below, let’s all help each other to succeed.

Until Next Time…


Top 5 Lessons Learned As A Small Business Owner

Getting from There…

I have been running my little business for just over 2 years now. And, as you can imagine, there was a learning curve. There is a lot that goes into starting up and running an at home business. Some things I expected, some were a complete surprise.

Let me share with you a few things that I learned.


Lesson 1: Invest in Quality

That rotten word. Money. We all need it, especially in this day and age of the cost of living crisis. The thought of spending money on equipment and software as well as a place to host your products is very off putting.

It was for me when I first started. I tried before in the past and didn’t do well, so I was very reluctant to do it only to find I would never make a sale.

But it is worth it! It is such an ego boost to know your effort has been worth it in that first sale. Just do your research and don’t just go for the cheapest option. Invest in decent quality equipment and products. Shop around, read reviews and make that investment.

It is also worth it to invest in advertising. Check to see how much it costs to advertise on your preferred platform. I will be honest, I did not want to invest in this area. But my husband went over my head and my fears and he paid for advertising on Facebook and Instagram. It brought in more views and more people to my Etsy shop at the start. So it is definitely something I would recommend you do when you start your small business and get that exposure at the start.

Lesson 2: Fees – The Hidden Charges

This did bite me in the rear end. I did not look into hidden costs on my selling platform, so therefore did not take this into account for my pricing.

I use Etsy. Simply for the ease of TAX purposes as they will add VAT to products if needed to. However, there are a tonne of hidden charges; Listing charges, operating fee, processing fees, transaction fees. I didn’t do my research, and got burned on these fees. They may seem small charges but they build up.

I strongly recommend checking for hidden fees before committing to a selling platform.

Lesson 3: Proof of Postage

Gah! Lost items in post!

It’s going to happen, sadly. Especially when you are sending a lot out and to somewhere outside the UK. Make sure you have proof of postage. No matter who your courier is, keep that proof of postage in order to claim for lost or damaged items.

I use Royal Mail 99% of the time. They are cheaper, more convenient, and more eco-efficient. And I either go to my local post office or use their collection service so I can get a receipt or email as proof of postage. I have managed to get most of the money back for lost or damaged items because I had these.

If you don’t, then the courier can either refuse you a refund or you get a partial payment to cover the lost item. That can be a lot of money lost. 

So get that proof of postage!

Lesson 4: Some are Never Happy

Sorry folks. I am not Amazon.

My first negative review was like a slap in the face. And it was something beyond my control (Lost item in post due to Royal Mail strikes) and they gave me a negative review before contacting me and it really did upset me.

It can be a big setback for many, and I took a mental health hit. It took me a couple of days but I eventually realised that you just can’t please everyone. And some lonely folks on the internet just have nothing better to do than leave bad reviews for the simplest things.

So, I guess what I am saying is, ride it out. Don’t give up and learn from it. You will get even more lovely reviews and it will swamp that bad review. You got this.

Lesson 5: Social Media Takes Time

The creative outlet that will bring more customers to your door (both digital and physical)

That’s the point of social media right? But it takes so much time. I was constantly doing social media planning and creation and spending less time with my family. While yes, it is important to post regularly it is also important not to lose sight of the important things.

It will take time to build up that following, the likes and then you have the research into how the algorithms work (especially when they change frequently. I am looking at you Instagram) So, please don’t be disheartened if you don’t get the likes you want, trust me you are being seen.

I now plan my social media posts a week in advance, that includes the image and caption as well as the tags. It has made things so much easier and getting a lot more likes since I am planning better.


…To Here

Every small business or independent contractor is going to have teething problems no matter what. These are just the main ones that really stood out for me.

It is easy to get frustrated and upset. But stick with it. Ride it out. It will work out in the end, you may not see much of a profit for the first year. Use that first 12 months to learn, adapt and improve. And you will start to see changes and all that hard work will be worth it.


Well, I hope that was helpful. Please let me know what you thought about this post in the comments below.

I am also on social media so please feel free to follow me using the links below.

Until next time, stay cool.